

Put it on your server
There are two ways to get clothes onto a server. Most people only need the first.
| Pack in place (recommended) | Build a fresh resource | |
|---|---|---|
| What | The pack the wizard edits is the resource | The studio builds a new resource from your project |
| When | Always, unless you need the other | A clean single resource, an EUP-style layout, or Singleplayer files |
Ready to ensure |
Right after adding clothes | After building |
Install a pack (pack in place)
Section titled “Install a pack (pack in place)”When you add clothes with the Add clothes wizard, the studio edits a real FiveM resource: stream files, the .ymt, shop meta and fxmanifest.lua. You can start it straight away.
If the pack already sits in your server’s resources folder, just add the line to server.cfg and restart:
ensure my_packIf it’s somewhere else, use Install on my server… (on the Overview, the Wardrobe as Put on my server…, or the wizard’s last page):
- The studio looks for
server.cfgabove the pack. If it can’t find one, it asks: Where is your server? (the folder holding server.cfg). - It shows what it’s about to do, before doing anything:
- Copy the pack into your server.
- Add one line to
server.cfg, after the last line of its kind:ensure my_pack. - A copy of
server.cfgis kept beside it first (server.cfg.noxbak).
- Click Install, then restart your server.
If the name is already used on the server, or the pack is already installed, it says so and changes nothing.
Build a fresh resource
Section titled “Build a fresh resource”Open Build clothing from the toolbar.
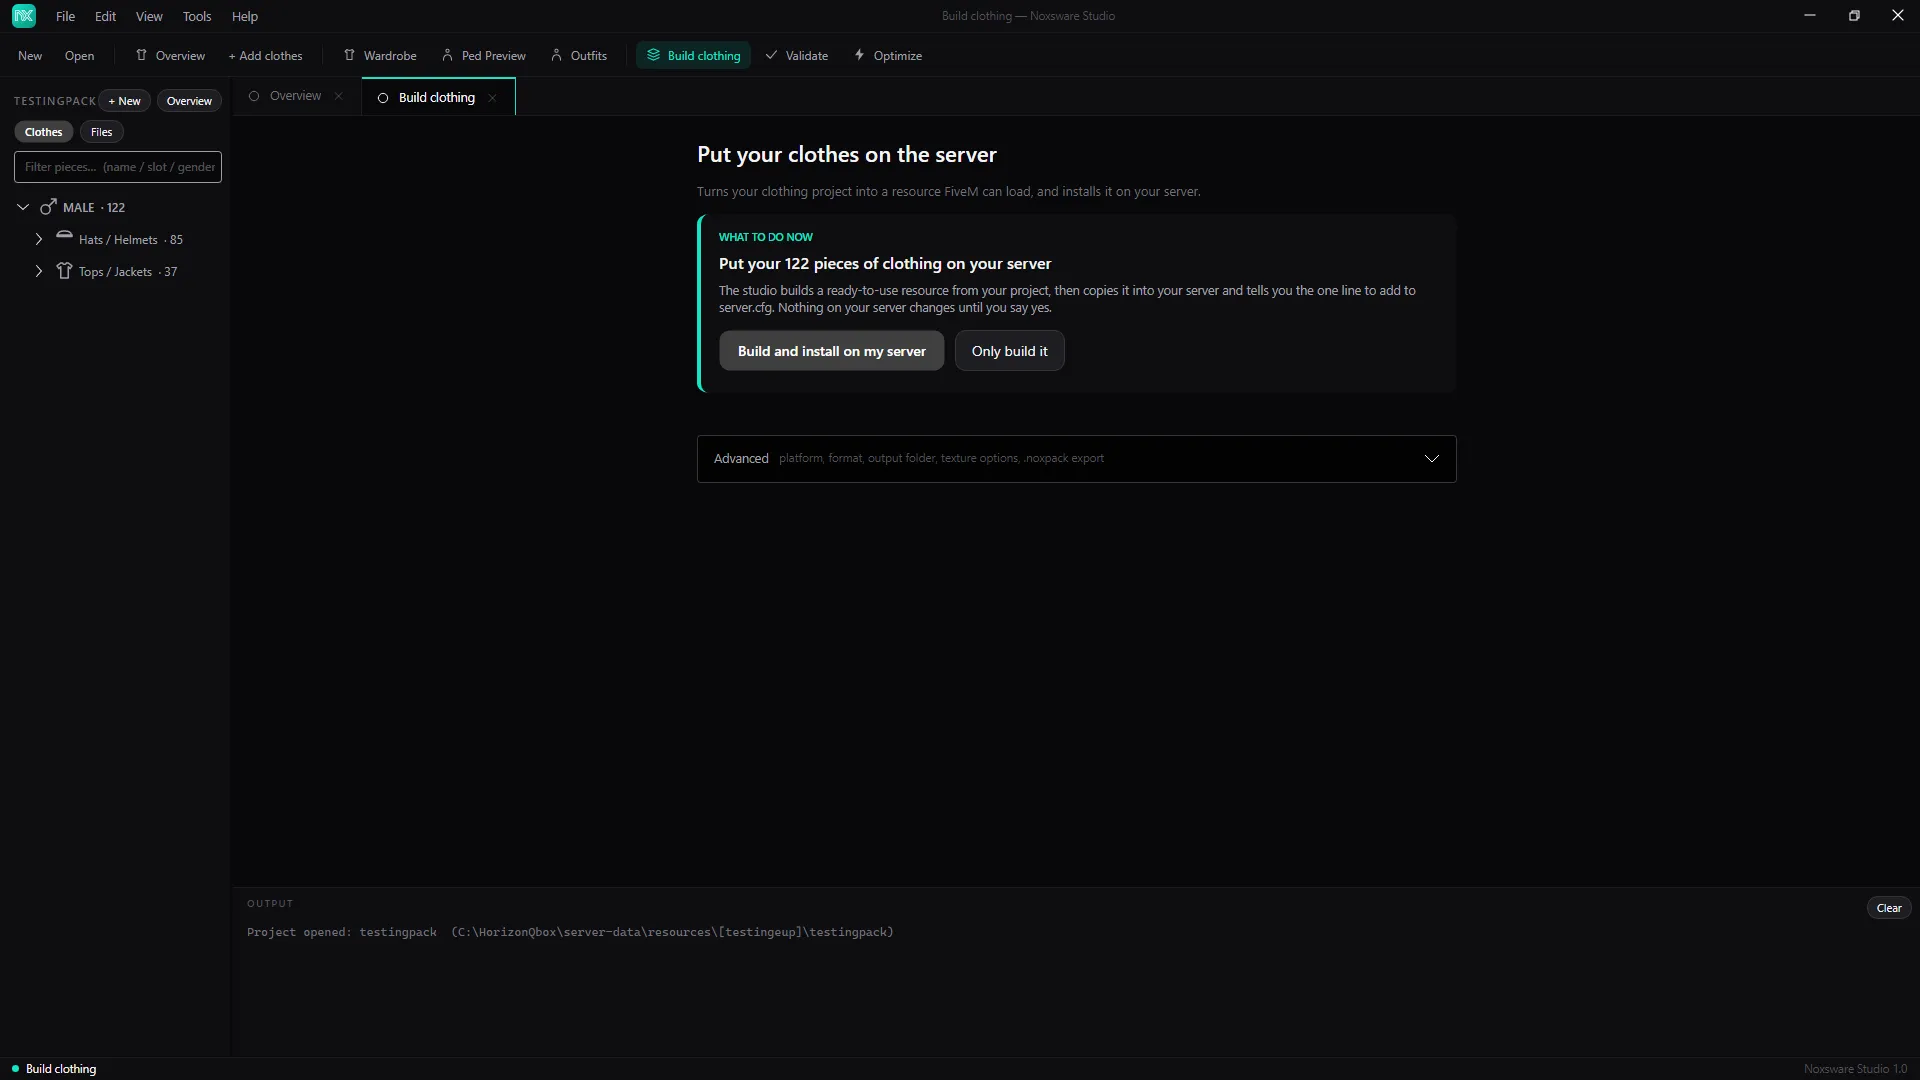
- Build and install on my server builds, then runs the install above.
- Only build it builds into the output folder.
When it’s done, the card changes to Built. Put it on your server with Install on my server and Open the folder.
Advanced options
Section titled “Advanced options”Open Advanced (platform, format, output folder, texture options, .noxpack export).
| Option | Choices |
|---|---|
| Platform | FiveM (Legacy), FiveM (Enhanced) or Singleplayer. Singleplayer writes the stream files only (no fxmanifest.lua); install them with OpenIV. |
| Format | Freemode add-on (with shop metas) or EUP-style (shorter file names, no shop meta). |
| Output folder | Empty means inside the project’s folder: %AppData%\Noxsware\Projects\<project>\build\. Browse… to pick another. |
| Optimize textures (DXT5/DXT1, mipmaps, resize) | On by default, with Max size 2048. See Optimize. |
| Remove mp_m/mp_f prefix | Drop the mp_m_freemode_01^ part of the file names. |
| Sub-folder per drawable type | stream/jbib/, stream/lowr/… instead of one flat folder. |
| Clothes info dump | Writes clothes_info.txt, a table of every piece. On by default. |
| Emit pedvariation .ymt.xml | Experimental. Writes the .ymt as XML for you to compile in CodeWalker. |
Buttons: Build resource, Install on my server…, Export .noxpack….
What a build contains
Section titled “What a build contains”my_pack/├─ fxmanifest.lua (not for Singleplayer)├─ mp_m_freemode_01_my_pack.meta (shop meta, men; Freemode format only)├─ mp_f_freemode_01_my_pack.meta (shop meta, women)├─ stream/│ ├─ mp_m_freemode_01^jbib_000_u.ydd│ ├─ mp_m_freemode_01^jbib_diff_000_a_uni.ytd│ └─ …├─ components.txt (source file → game name)├─ clothes_info.txt (optional table of every piece)└─ README.txtThe result line reads like Built 122 pieces, 874 colour files · textures 980MB→330MB (120 optimized) → path, followed by any warnings.
Export a .noxpack
Section titled “Export a .noxpack”Export .noxpack… saves the whole clothing project and its source files as one file to hand to someone else. They open it from the Start page with Import clothing package (.noxpack)….