
Add clothes
The Add clothes wizard is the main way to get clothes into a pack. Open it with + Add clothes in the toolbar, Add clothes… on the Wardrobe, or File → Add clothes… (guided).
Step 1: What have you got?
Section titled “Step 1: What have you got?”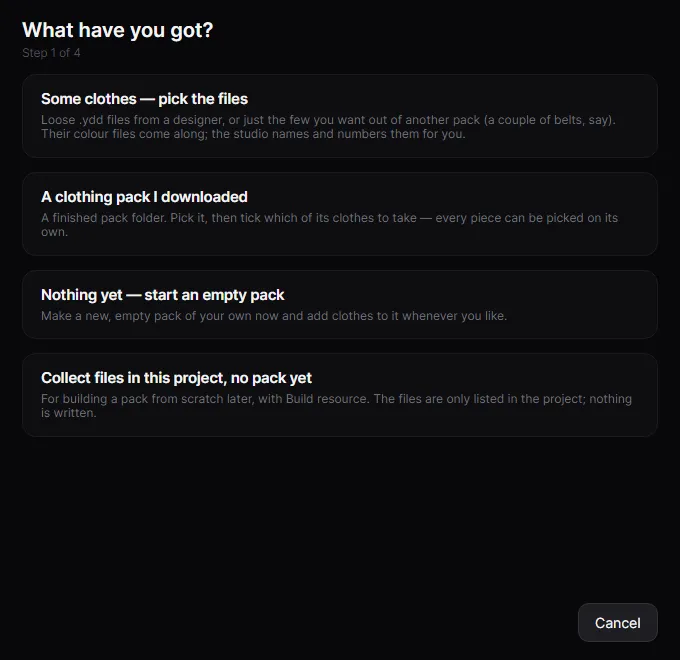
| Choice | Use it when |
|---|---|
| Some clothes — pick the files | You have loose .ydd files from a designer, or want just a few out of another pack. Pick the .ydd (or .yft) files; their colour files beside them come too. |
| A clothing pack I downloaded | You have a finished pack folder. Pick the folder, then tick which of its clothes to take. |
| Nothing yet — start an empty pack | Make a new, empty pack now and add clothes to it later. Skips to step 3. |
| Collect files in this project, no pack yet | You want to build a pack from scratch later with Build resource. The files are only listed in the project; nothing is written. |
Step 2: This is what I found
Section titled “Step 2: This is what I found”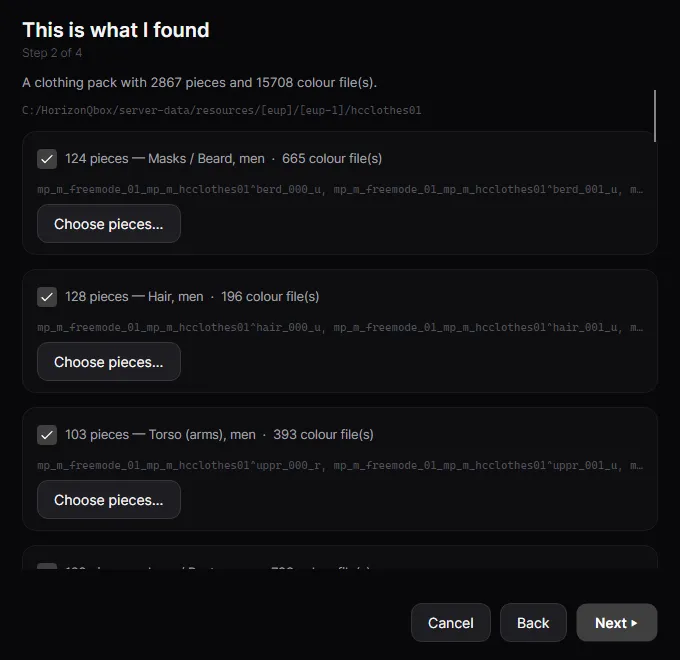
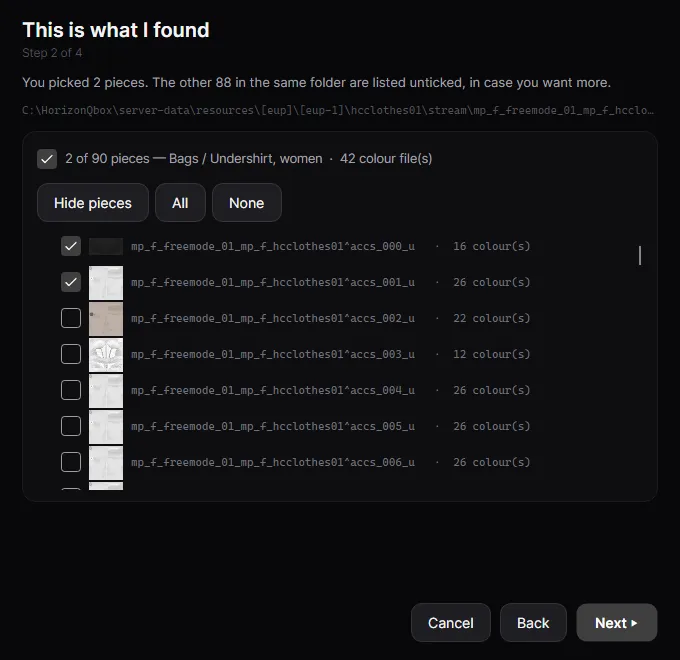
The top line sums it up, for example A clothing pack with 2867 pieces and 15708 colour file(s). If you picked a few files out of a folder, the others in that folder are listed unticked, in case you want more.
Each card is one group: a kind, for men or women. Untick a card to leave the whole group out, or click Choose pieces… to tick piece by piece with thumbnails (All / None help).
Yellow card: “I could not tell what these are from their names.” Pick what they are (props are marked (worn on top)), and whether men or women wear them, then click That’s right. You can’t go on until every highlighted group is named.
LEFT OUT lists files that can’t come in, with the reason:
- no colour file (.ytd) beside it, so it has nothing to wear: put the piece’s
.ytdfiles next to its.yddand pick it again. - locked by its creator (escrow), so it cannot be copied: there is no way around this.
Step 3: Where should they go?
Section titled “Step 3: Where should they go?”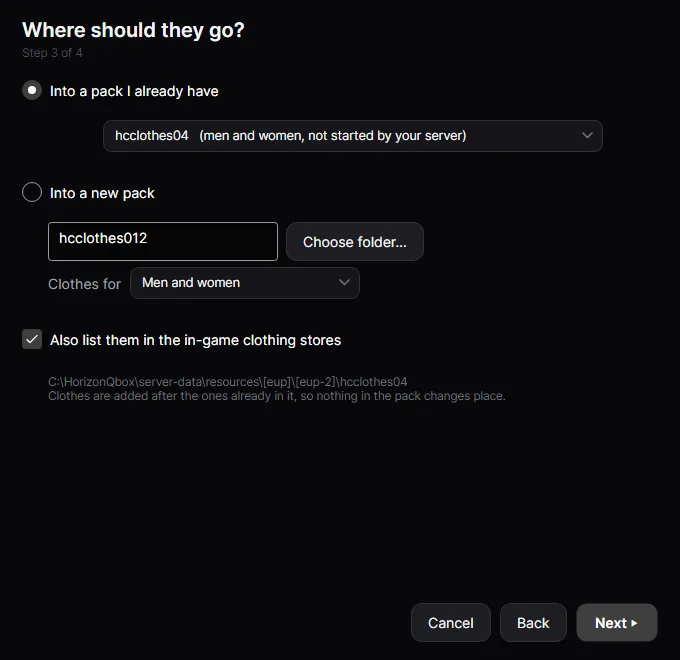
- Into a pack I already have. The list shows the packs in your project and the packs your server starts, with who they’re for (men and women) and whether your server starts them yet. Clothes are added after the ones already there, so nothing in the pack changes place.
- Into a new pack. Type a name, Choose folder… for where it goes, and pick Clothes for: Men and women, Men only or Women only.
- Also list them in the in-game clothing stores (on by default) adds each piece to the pack’s shop meta. Without it, clothes still work in clothing-menu scripts but don’t show in the vanilla stores. If the pack has no shop list at all, the wizard tells you.
Step 4: Here is what will happen
Section titled “Step 4: Here is what will happen”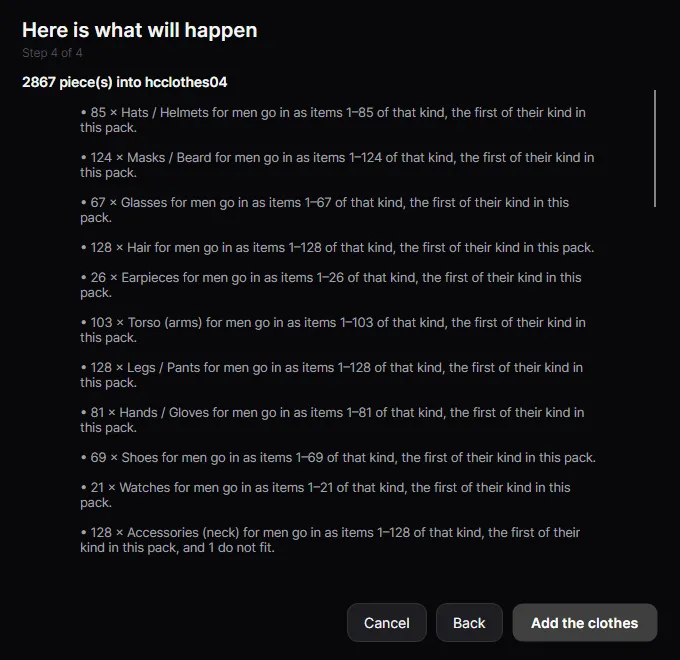
Nothing has been written yet. This page lists exactly what will:
- 3 × Tops / Jackets for men go in as items 47–49 of that kind
- N colour file(s) are copied in and renamed to the names the game expects. Nothing already in the pack is replaced or renumbered, so outfits players already saved keep working.
- for example hoodie becomes mp_m_freemode_01_mp_m_x^jbib_046_u
- Your server does not start this pack yet — it needs the line: ensure name
What does not fit
Section titled “What does not fit”If a slot would go past 128 pieces, a WHAT DOES NOT FIT choice appears:
- Leave them out (default): those pieces are skipped.
- Put them in another pack I already have.
- Make a new pack for them: a second pack next to the first.
Click Add the clothes. You’ll see Adding N of M… while it copies.
The last page says how many pieces are now in the pack, and what to do next:
- Install on my server… copies the pack into your server and tells you the line for
server.cfg. See Put it on your server. - Open the pack folder.
- Copy the server.cfg line:
ensure <pack>. Add it once, then restart the server.
The studio also writes a .csv of menu numbers into the pack’s .noxsware folder, listing the number each new piece has in clothing menus.
Every import is recorded. File → Undo an import… lists them newest first. Pick one and click Undo import: it removes the copied files (and the new pack, if one was made), brings back any replaced files, and restores the .ymt and shop meta to how they were.
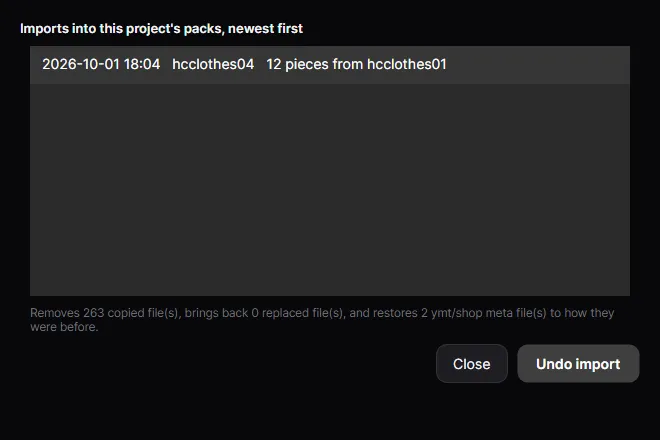
If later changes make a clean undo impossible, the dialog explains why (Cannot undo: …) and offers Undo anyway.
How the studio recognises files
Section titled “How the studio recognises files”- Kind comes from the slot code in the file name (
jbib,lowr,p_head…). Without one, it looks for words like top, jacket, pants, shoe, boot, glove, hat, helmet, glass. - Men or women from
mp_f_/female(women) ormp_m_/male(men). Default is men. - Skin from
_r(shows skin) or_u(covers the skin). - Alternate models ending
_1,_2are kept with their main piece. - Colours are matched to their piece by number and ordered by letter.
If a guess is wrong, fix it on the piece page.